How to Use ONREVA Toolbox Foam: A Step-by-Step Guide
Keeping your tools organized and protected is essential for both professionals and DIY enthusiasts.ONREVA Toolbox Foamis a versatile solution that helps you organize your tools, prevent damage, and streamline your workflow. Whether you’re new to toolbox foam or looking to optimize its use, this guide will walk you through how to use ONREVA Toolbox Foam effectively.
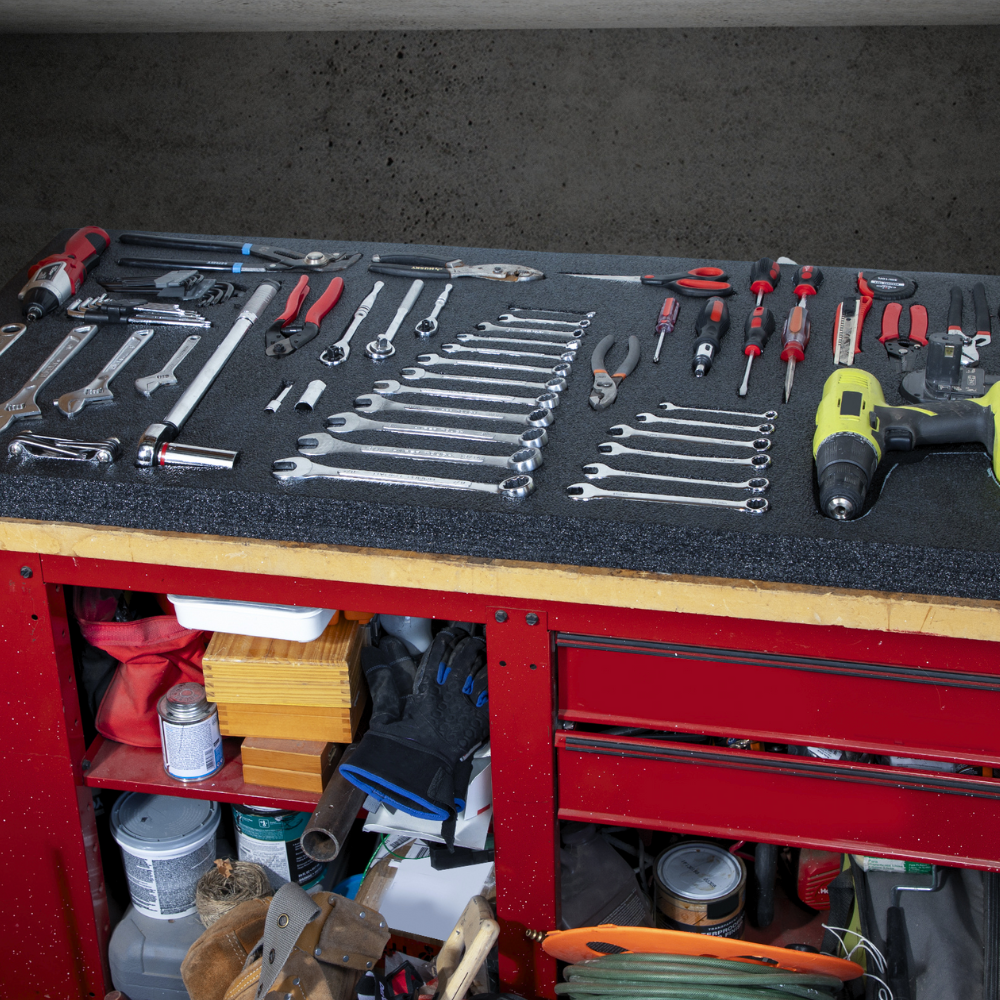
Step 1: Gather Your Tools and Measure Your Toolbox
Before you begin working with ONREVA foam, it’s important to gather all the tools you want to store in the toolbox. This will help you visualize the layout and make sure every tool has a designated spot.
- Measure Your Toolbox: Measure the dimensions of your toolbox or drawer to ensure the foam fits properly. ONREVA foam typically comes in various thicknesses and sizes, so pick one that suits your toolbox's depth.
- Plan the Layout: Arrange your tools on a flat surface in a way that you’d like them to be stored in the toolbox. Group similar tools together and ensure there’s enough space between them for easy access.
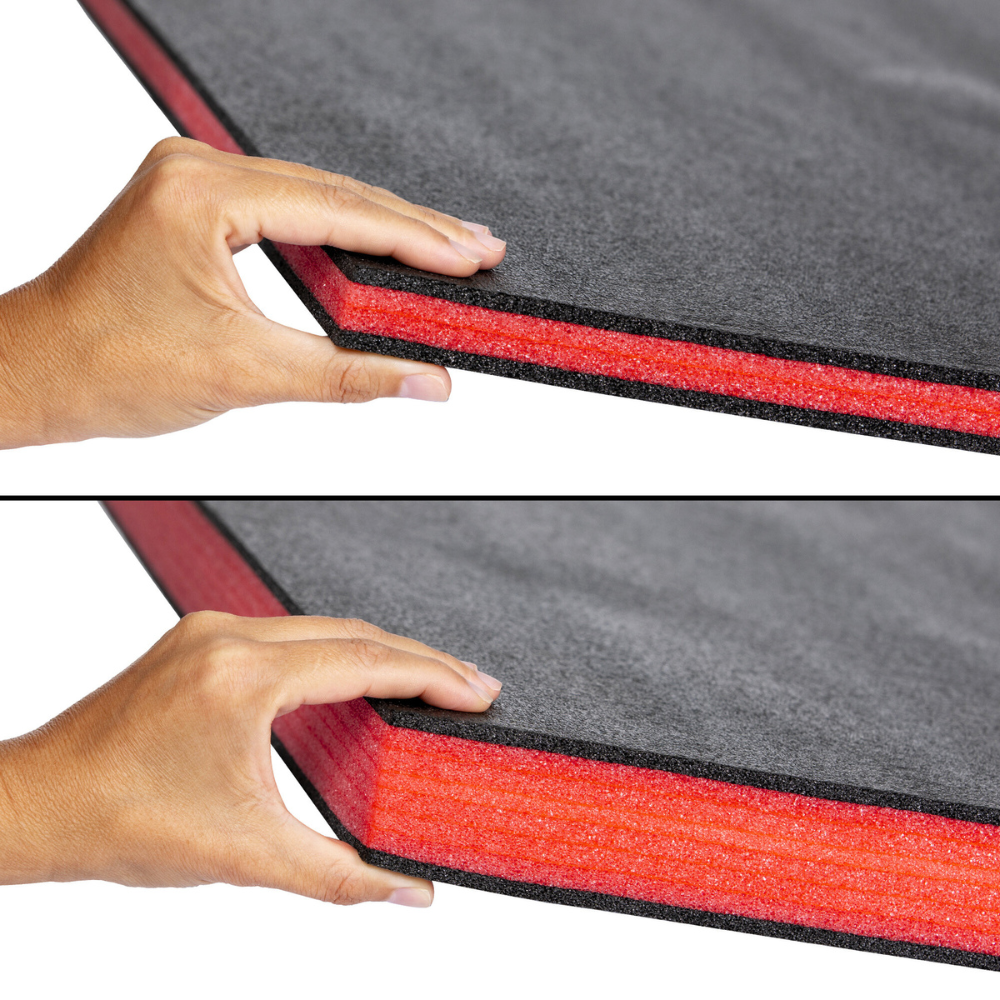
Step 2: Choose the Right Foam Thickness
ONREVA Toolbox Foam comes in different thicknesses, typically ranging from 1 inch to 2 inches. Choosing the correct thickness is essential to ensure your tools fit securely in the foam without being too deeply embedded or sticking out.
- Small Tools: For smaller hand tools like wrenches and screwdrivers, a thinner foam (around 1 inch to 1.5 inch) is usually sufficient.
- Larger Tools: For larger or heavier tools like drills, hammers, or pliers, you’ll want thicker foam (around 2 inches to 3 inches) for better protection and support.
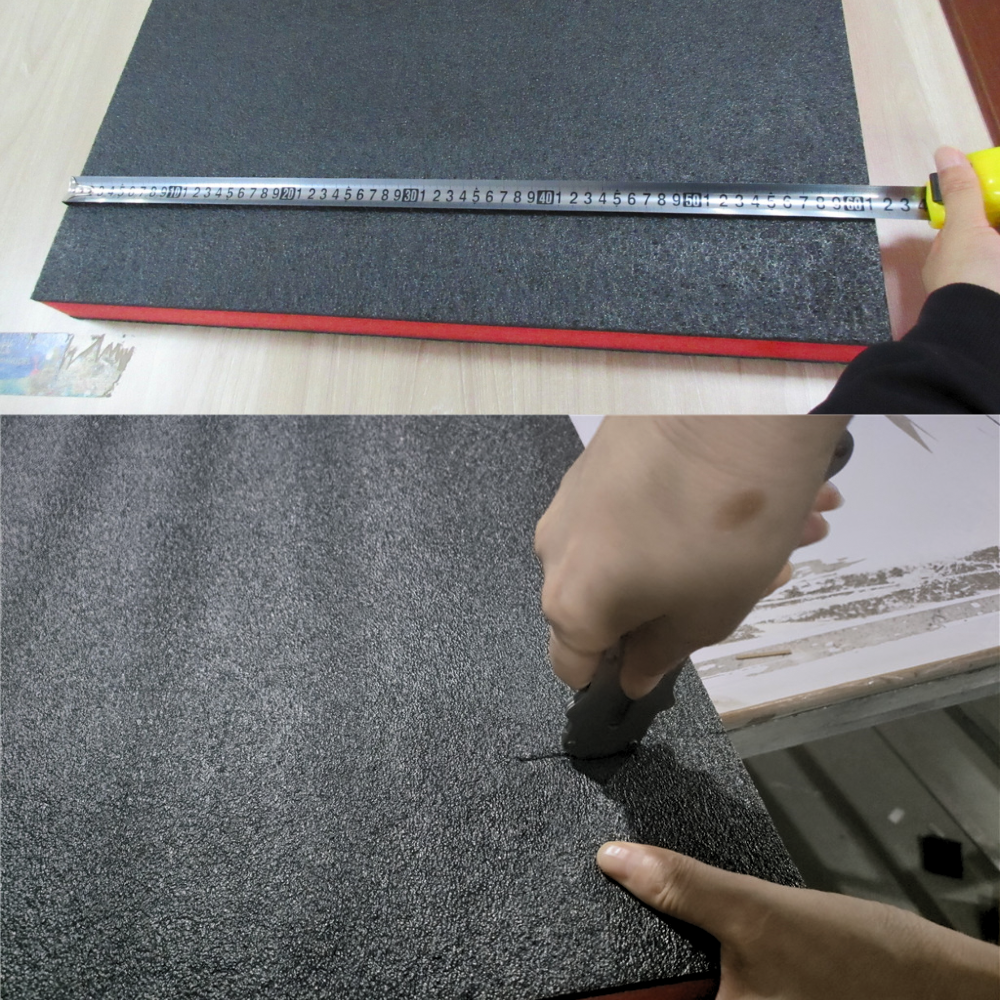
Step 3: Cut the Foam to Fit Your Toolbox
Now that you’ve measured your toolbox and chosen the right foam thickness, it’s time to cut the foam to fit perfectly inside your toolbox or drawer.
- Mark the Dimensions: Place the foam in your toolbox and mark where it needs to be cut. Be precise with your measurements to avoid having gaps or overhangs.
- Cutting the Foam: Use a sharp utility knife or foam cutter to cut the foam. Make long, smooth cuts to avoid jagged edges. It’s best to cut the foam slightly larger than your measurements to ensure a snug fit inside the toolbox.
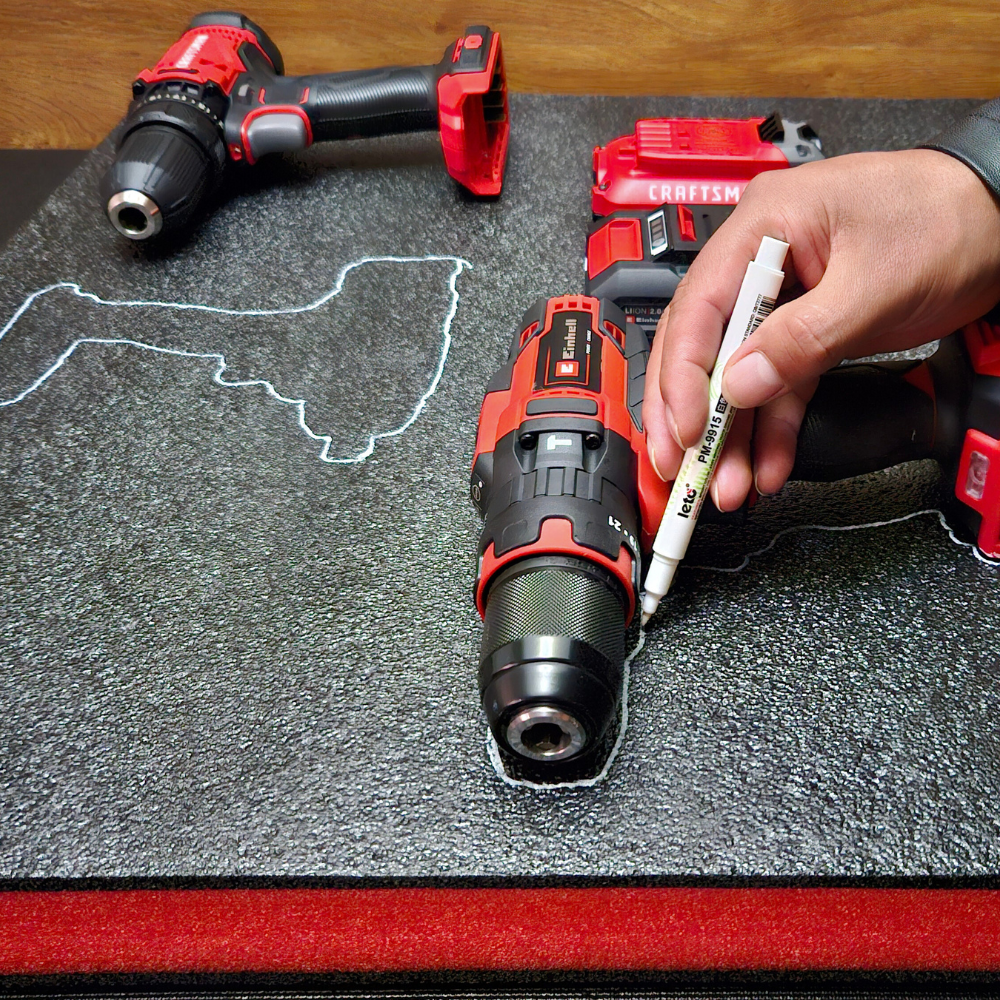
Step 4: Lay Out Your Tools and Trace Their Shapes
Once you’ve cut the foam to size, arrange your tools on the foam in the exact layout you planned earlier. Take your time here to make sure each tool has enough space around it and is placed in a way that’s easy to access.
- Maximize Space: Try to place tools close together without them overlapping. This will maximize the use of space while keeping everything organized.
- Mark the Outlines: Use a marker to carefully trace the outline of each tool on the foam. If you want a cleaner look, some people prefer using chalk or a light-colored pen to avoid visible marks later on.
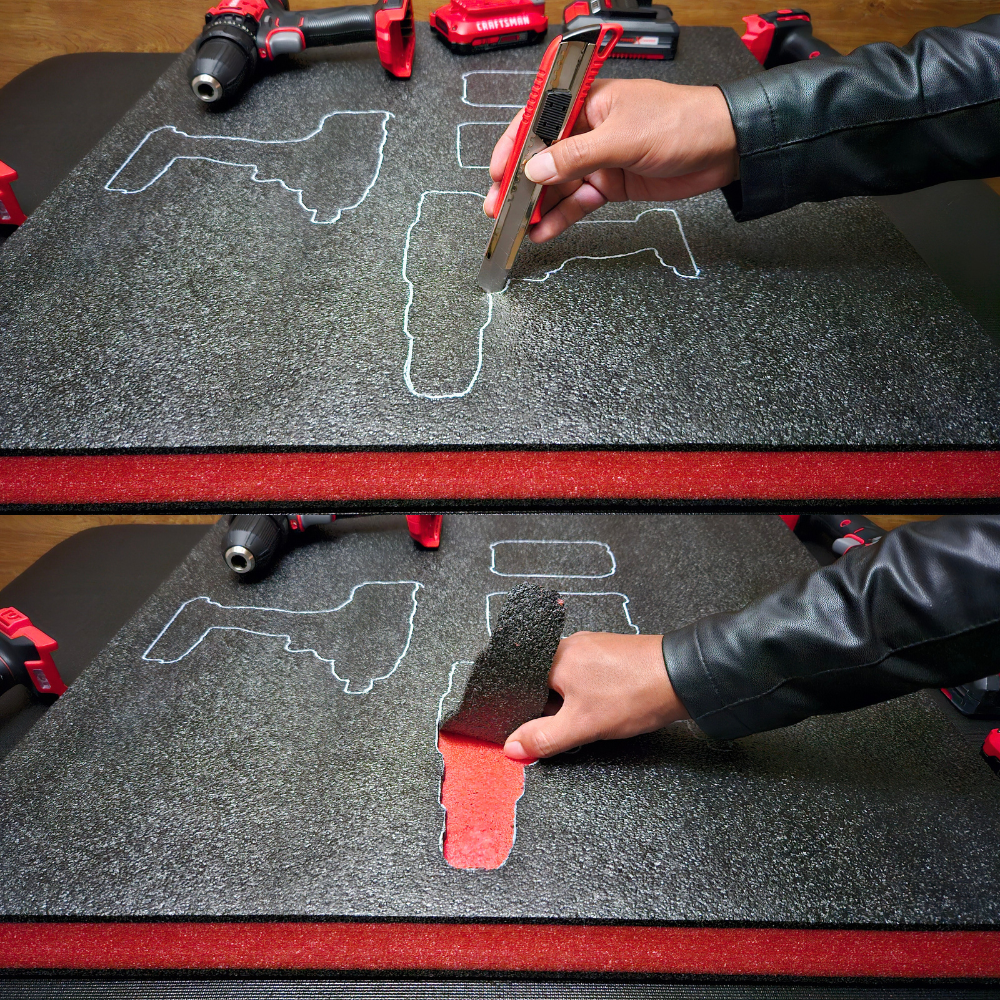
Step 5: Cut Out the Tool Shapes
- Use a Sharp Utility Knife: A sharp utility knife or specialized foam cutter works best for this task. Make small, controlled cuts along the traced lines.
- Adjust Depth: Excavate the foam gradually by cutting through one layer at a time until you reach the desired depth for each tool or item.
- Test Fit: As you cut each tool slot, test the fit by placing the tool in its cutout. The tool should fit snugly without being too tight or loose.
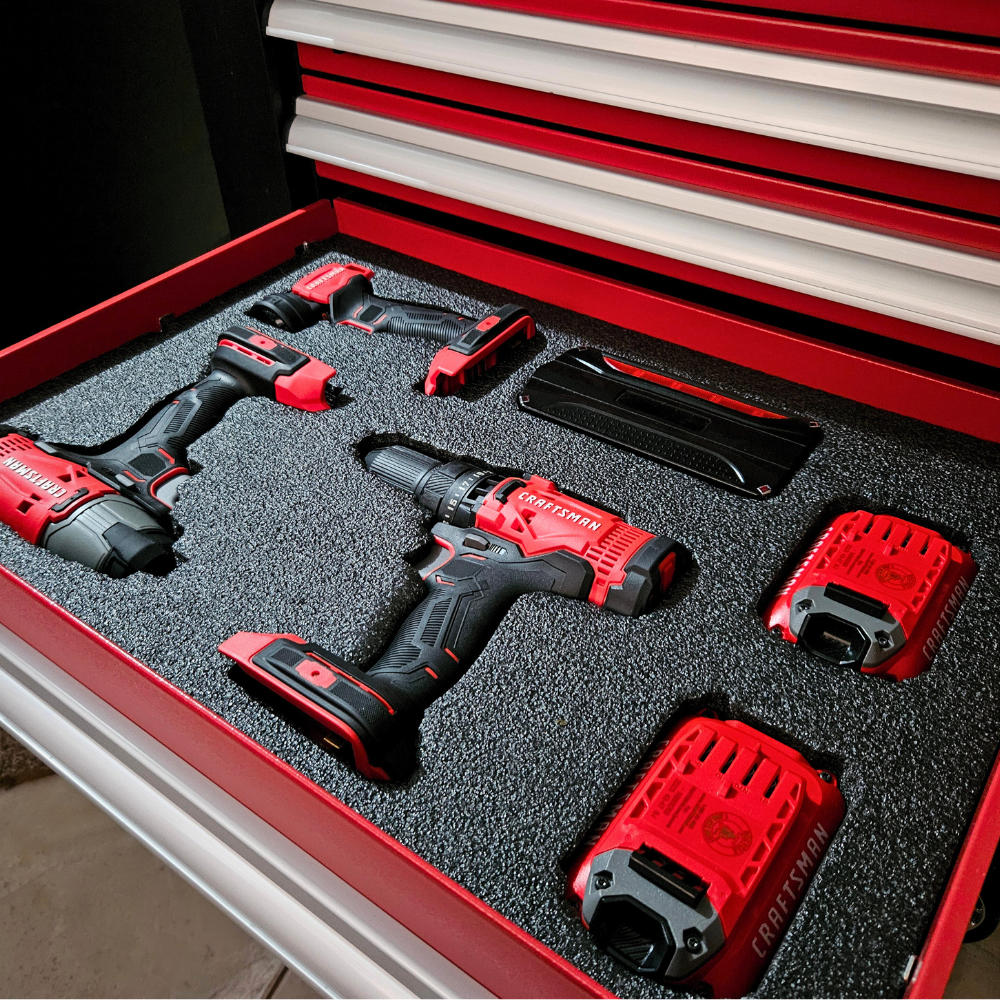
Step 6: Organize and Insert Tools
Once all the cutouts are made, start placing your tools into the foam. Each tool should fit securely into its slot, with no movement or rattling when the toolbox is handled or transported.
- Double-Check for Adjustments: Ensure all your tools fit as planned. If any cutouts are too tight or too loose, make small adjustments to improve the fit.
- Layered Storage: If your toolbox has multiple drawers, you can use different layers of ONREVA foam for each drawer. This helps organize tools by type or usage frequency.

